Ingredients you’ll need
To make the most scrumptious chocolate-covered strawberries, you’ll need only a few simple ingredients. First off, grab some fresh and ripe strawberries – make sure they are plump and juicy for the ultimate sweetness. Next, ensure you have high-quality chocolate – whether you prefer dark, milk, or white chocolate, choose the one that tantalizes your taste buds the most. Lastly, gather any additional toppings or decorations you’d like to sprinkle on top of your chocolate-covered strawberries for that extra pizzazz.
Don’t fret about complicated or expensive ingredients; simplicity is key when it comes to creating this delightful treat. With just strawberries, chocolate, and a sprinkle of your favorite toppings, you’ll be well on your way to indulging in a delicious and decadent dessert. So, gather your ingredients and get ready to embark on a mouth-watering adventure of making your very own chocolate-covered strawberries.

Choosing the best strawberries
When it comes to selecting the best strawberries for your chocolate-covered treat, opt for ones that are vibrant in color and plump in size. Look for strawberries that are firm to the touch and have a bright red hue, avoiding any that are mushy or have bruises. Remember, the fresher the strawberries, the better the end result will be.
Another tip for choosing the perfect strawberries is to give them a sniff. A sweet, fragrant aroma indicates that the strawberries are ripe and flavorful. Avoid any strawberries that lack a distinct smell, as they may not be as tasty. By carefully selecting the best strawberries, you can ensure that your chocolate-covered treats are not only visually appealing but also bursting with juicy sweetness.
Selecting the right chocolate
When it comes to picking the perfect chocolate for your chocolate-covered strawberries, you want to go for high-quality chocolate that will melt smoothly and taste divine. Opt for a good quality chocolate bar or chocolate chips with at least 70% cocoa content for a rich and decadent flavor. Dark chocolate works best for a sophisticated taste, milk chocolate for a sweeter touch, and white chocolate for those who prefer a creamy and delicate flavor.
Consider choosing chocolate that is specifically labeled “melting” or “dipping” chocolate as it is specially formulated to melt smoothly and create a beautiful glossy finish on your strawberries. Avoid using chocolate with added ingredients like nuts or rice crisps, as they can interfere with the smooth texture of the chocolate coating. Experiment with different brands and types of chocolate to find the one that suits your taste buds best and complements the sweetness of the strawberries to perfection.
Preparing the chocolate for dipping
To prepare the chocolate for dipping, start by choosing a high-quality chocolate that is suitable for melting. Whether you opt for dark, milk, or white chocolate, ensure it is of good quality to achieve a smooth and glossy finish on your strawberries. Break the chocolate into small, uniform pieces to ensure even melting and ease of handling during the dipping process.
Next, place the chocolate pieces in a microwave-safe bowl or a heatproof bowl set over a pot of simmering water. Gently melt the chocolate in short intervals, stirring regularly to prevent burning. Be patient and avoid the temptation to rush the melting process by turning up the heat, as this can result in a grainy texture. Once the chocolate is smooth and fully melted, it is ready to be used for dipping your fresh strawberries.
Cleaning and drying the strawberries
Once you’ve picked out the freshest strawberries, it’s time to get them all cleaned up. Start by giving them a gentle rinse under some cool water. Be careful not to soak them for too long, as strawberries can be sensitive little things. Then, just gently pat them dry with a clean kitchen towel.
After your strawberries are all clean and dry, it’s essential to remove the stems. You can do this by gently twisting the stem between your fingers until it comes off easily. If you’re feeling fancy, you can also use a paring knife to cut a small V-shape around the stem to remove it. Just be sure to take your time and be careful not to remove too much of the strawberry along with the stem.
Dipping the strawberries in chocolate
So, once you’ve got your perfectly plump and juicy strawberries ready to go, it’s time to dunk them in that rich, velvety chocolate. You can take the easier route and melt some chocolate chips in the microwave, stirring every 30 seconds until smooth. Or, you can go for the fancier option of using a double boiler to melt high-quality chocolate for a more decadent experience.
Now, hold your strawberry by the leafy green top and gently dip it into the melted chocolate, making sure to coat the fruit evenly. Give it a little shake to let any excess chocolate drip off, and then place it onto a parchment-lined baking sheet to set. Repeat this process with all your strawberries, and don’t be afraid to get creative with different types of chocolate or even add a drizzle of white chocolate for a swirled effect.
Decorating with toppings
Once your chocolate-covered strawberries are nicely dipped and set to dry, it’s time to add some pizzazz with toppings. Choose a variety of toppings to cater to different tastes – from crushed nuts and sprinkles to shredded coconut and mini chocolate chips. Get creative and experiment with different combinations to make each strawberry unique and visually appealing. Remember, the key is to have fun and let your imagination run wild!
Once you’ve selected your toppings, gently sprinkle or roll the chocolate-covered strawberries to fully coat them. Be generous or minimalist—it’s totally up to you! Whether you prefer a fully-loaded extravaganza or a simple, elegant touch, toppings are the finishing touch that will take your chocolate-covered strawberries to the next level. So go ahead, get your sprinkle on and make those strawberries pop with color and texture!
Setting the chocolate-covered strawberries to dry
Once you’ve coated your strawberries in the velvety chocolate goodness, it’s time to let them dry. This step is crucial to ensure that the chocolate sets beautifully on the strawberries.
Find a clean baking sheet or plate and carefully place each chocolate-covered strawberry on it. Make sure to give them some space so they can dry evenly. Now, resist the urge to pop one in your mouth right away – patience is key here! Let the strawberries sit at room temperature until the chocolate hardens, usually for about an hour or so.
Storing your chocolate-covered strawberries
Once you’ve dipped and decorated your strawberries in chocolate, you’ll need to figure out the best way to store them. To keep your chocolate-covered strawberries fresh and delicious, it’s essential to store them properly. One of the best methods is to place them in an airtight container and store them in the refrigerator. Make sure to line the container with a paper towel to absorb any excess moisture and help preserve the strawberries.
Alternatively, you can also store your chocolate-covered strawberries in a single layer on a wax paper-lined tray in the fridge. This method prevents the strawberries from sticking together and allows for better air circulation, helping to maintain their texture and flavor. Remember to consume your chocolate-covered strawberries within a few days for the best taste and quality.
Enjoying your delicious treat
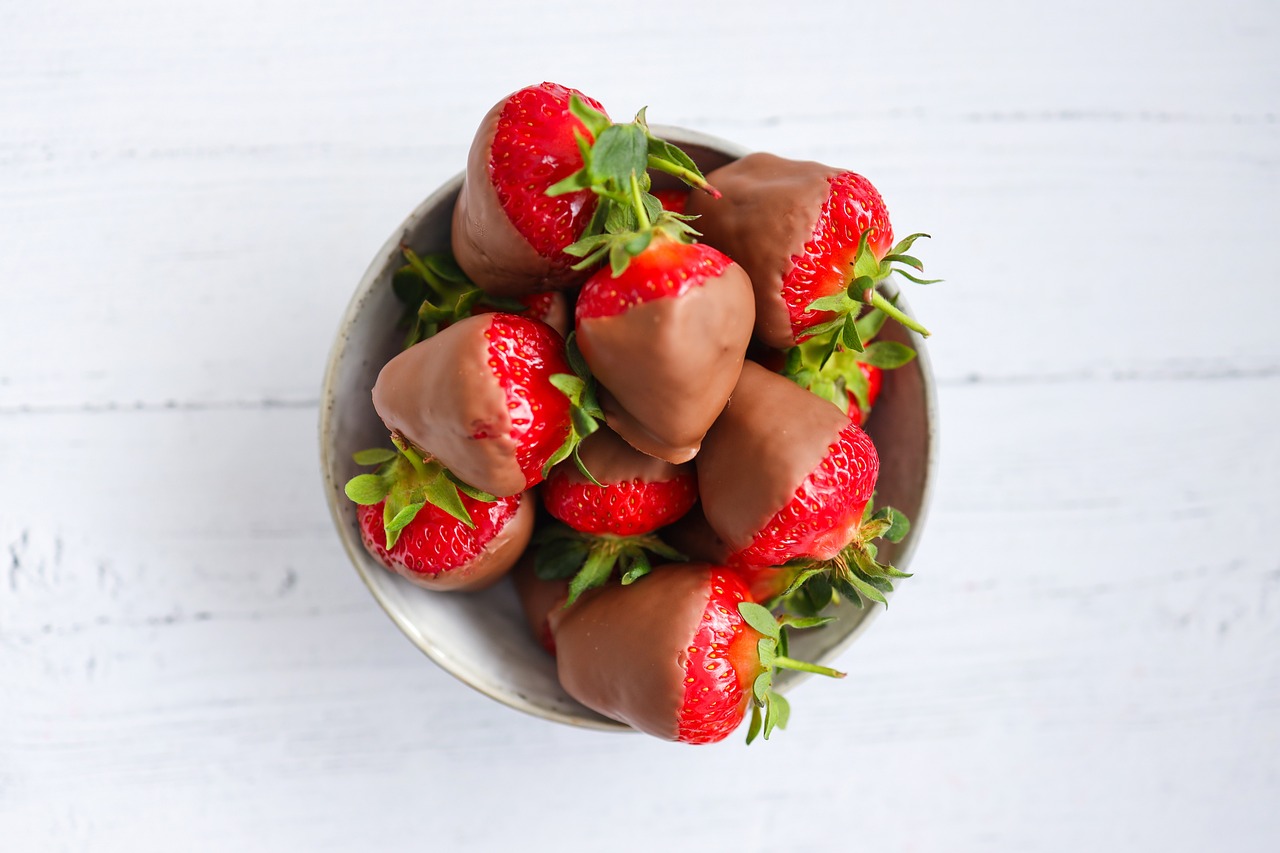
Indulge in the sweet reward of your efforts by savoring the luscious combination of juicy strawberries and decadent chocolate. Take a moment to appreciate the tantalizing blend of flavors as you bite into the crisp outer shell of chocolate, giving way to the juicy burst of strawberry goodness beneath.
As you enjoy your chocolate-covered strawberries, let the velvety chocolate melt in your mouth, complementing the freshness of the strawberries with each delightful chew. The contrast between the rich chocolate and the tangy sweetness of the strawberries creates a harmonious taste experience that is sure to leave you craving more.

Chocolate-Covered Strawberries
Equipment
- Baking sheet
Ingredients
- 1 lb fresh strawberries washed and dried
- 12 oz semisweet chocolate chopped
- 2 tablespoons coconut oil or vegetable oil optional
Instructions
- Line a baking sheet with parchment paper.
- In a double boiler or microwave-safe bowl, melt the chocolate, stirring frequently, until smooth. Stir in the coconut oil or vegetable oil, if using, to thin the chocolate.
- Holding them by the stems, dip the strawberries one at a time into the melted chocolate, turning to coat completely.
- Gently shake off any excess chocolate and place the dipped strawberries on the prepared baking sheet.
- Refrigerate the chocolate-covered strawberries for at least 30 minutes, or until the chocolate is set.
- Serve chilled.
Notes
- Savor the luscious combination of juicy strawberries and decadent chocolate
- Appreciate the tantalizing blend of flavors with each bite
- Let the velvety chocolate melt in your mouth, complementing the freshness of the strawberries
- Experience the harmonious taste of rich chocolate and tangy sweetness
What kind of strawberries should I use for chocolate-covered strawberries?
It’s best to choose ripe, firm strawberries that are not too large or too small for the perfect chocolate-to-strawberry ratio.
How should I choose the right chocolate for dipping?
Look for high-quality chocolate that is specifically made for melting and dipping, such as dark, milk, or white chocolate chips or bars.
How do I clean and dry the strawberries before dipping them in chocolate?
Rinse the strawberries under cool water, pat them dry with a paper towel, and let them air dry completely before dipping them in chocolate.
Can I add toppings to my chocolate-covered strawberries?
Absolutely! Get creative with toppings like chopped nuts, sprinkles, coconut flakes, or drizzled caramel or white chocolate.
How should I store my chocolate-covered strawberries to keep them fresh?
Store your chocolate-covered strawberries in an airtight container in the refrigerator for up to 2-3 days for the best taste and texture. Enjoy them as soon as possible for the ultimate freshness!
